Acrylic (also known commonly by the brand name Plexiglas) boasts a strong resistance to scratching, which is why it’s doubly annoying when an element manages to break through that resistance and blemish the material. Though one scratch will do little to affect its durability, that one flaw can open your acrylic sheet up to more damage in the future (to say nothing of the fact that it doesn’t look very good with a gouge cut into it). Luckily, it’s a simple process to get even deep scratches out of acrylic; all you need is the right tools and a little bit of elbow grease.
Light Scratches
To begin with, you’ll need the following items.
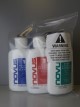
- Acrylic/plastic polish
- 800 and 1200 grit sandpaper
- Water for soaking the sandpaper
Start by soaking a piece of the 800 grit sandpaper in water, applying enough moisture to the surface so that a slight slurry is created when the paper is rubbed in a circular motion against the acrylic. Repeat for two to three minutes, applying constant pressure. During this process, your acrylic may take on a frosted appearance or look as though it’s experienced several smaller scratches. Don’t worry; these elements are normal and will vanish during forthcoming steps.
Next, soak a piece of 1200 grit sandpaper in water and repeat the process, this time rubbing in a circular motion until all scratches have disappeared from the surface. Dry with a soft, dry, clean cloth before using a different cloth (also soft and dry) to apply the plastic polish. Apply again in a circular motion. It may take a few applications to get your acrylic to your desired level of shine, so be patient and take brief breaks between coats in order to give your arm a chance to rest.
Moderate Scratches
Run your fingernail across the surface of the acrylic to determine whether a scratch is too deep for the above method. If you can feel the scratch, you’ll likely have to add another step to that process in order to ensure proper smoothness and shine. Instead of starting with 800 grit sandpaper, you’ll want to start with 600 grit instead. Soak it as you would for the 800 or 1200 grit and rub it on the acrylic in a circular motion for two or three minutes, then follow the method for light scratches as described.
Deep Scratches
If you conduct the depth test and find that your fingernail gets caught in the scratch, it may be too deep for you to repair without specialized equipment. Those not in possession of said equipment may be better off just leaving the scratch alone; but if you have the right tools (or are simply determined to get the scratch out no matter what its depth), there are steps you can take that mimic how professionals repair damaged acrylic.
For the first method, you’ll need the following.
- A variable-speed rotary polisher
- A foam buffing pad
- A wool buffing pad
- Super duty rubbing compound
Attach the wool pad to your polisher and then apply the compound to the pad; spread on the surface at a low RPM. Once spreading is complete, raise the polisher’s RPM to 1800 and sweep the pad back and forth in a continuous motion to smooth out the scratches. Be delicate with this step - applying too much pressure or allowing the pad to remain in one position can burn the acrylic. As you smooth, you may notice compound clotting in the pad. To remove it, run the polisher with the pad facing outward and run your spur tool (which should come with your polisher) from the center of the pad to its edge as it spins. You may need to execute this process multiple times while compounding.
Once compounding is complete, replace your wool pad with a foam one and spray the surface of the acrylic with a thin layer of protectant. Use the polisher at a low RPM to spread it over the affected area, then turn the RPM up to 1800 in order to buff it in until the surface is completely dry.
If you don’t have a rotary polisher - but do have a heat gun - you can try this method instead. First, follow the entire process as described for moderate scratches. Then, aim your heat gun at any scratches that remain while holding it three to four inches from the surface of the acrylic. Move it back and forth in a continuous sweeping motion; doing so will soften the acrylic, allowing it to fill the divot created by the scratch and making it disappear. Be careful not to hold the gun too close or to allow it to linger in one spot, as doing so can cause the acrylic to blister or warp.
Conclusion
Acrylic is celebrated for its remarkable flexibility, flexibility that includes its ability to be repaired should some element manage to break through its remarkable scratch resistance. It may take some specialized tools and a bit of hard work, but the effort you put in will be more than worth it when you see your acrylic returned to its flawless, lustrous shine. Now that you know the ease of repairing this plastic, we hope you’ll consider adding this attractive, durable material to your manufacturing processes. We have a wide variety of acrylic sheets at A&C are always available to answer whatever questions you might have about our products or about plastics in general.